Hello, there! Today my sons and I decided to create some custom made photo vases for Mother's Day. I've seen tutorials all over Pinterest on creating your own, "drink coasters," so we decided to give it a try and make our own photo vases.

First, I wanted a black and white photo to place onto our vase. We picked out one of our favorite photos and inserted it onto Microsoft Word 2010.
Once you insert the photo follow these steps to convert your photo to any color you want:
Click on this PINK tab labeled, "PICTURE TOOLS."

Click on, "COLOR."

Choose your color. We choose the first black and white shade.
.jpg)
Take (1) sheet of white tissue paper and one sheet of printer paper

At first, I cut the tissue paper the same size of the printer paper and then taped the edges round the tissue paper. DON'T DO THIS!!

BECAUSE THIS WILL HAPPEN! FAIL!

INSTEAD, I Cut the tissue paper smaller than the printer paper and taped them together along all the edges. So every single edge needs to be taped down.
I must add.. I don't have any special printer. Just a regular Canon ink jet printer. I am no where close to being computer or printer savvy so, if I can do this... YOU CAN TOO!
-Run it through your printer and it should come out like this:

Cut the photos out

Now gather your second set of items needed
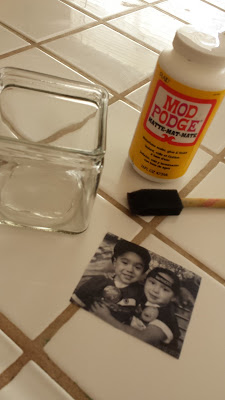
Paint some Mod Podge on the vase where you want to place your tissue paper photo


Now place a coat of Mod Podge over the tissue paper photo. Don't freak out! It will appear white but Mod Podge dries clear.

You can take a Q-tip and clean off the extra Mod Podge around the photo. Or not, that too will dry out clear, but I'm just OCD like that. =)

Let it dry..

After it's completely dry give it a second coat of Mod Podge. Or as many coats as you like.
Gather some flowers and enjoy! Hope you all have a HAPPY MOTHERS DAY! =)
